Formatting Text
Category : 4th Class
Formatting text means changing the look of the text. Advanced word processor, such as Word, includes specialized tools that help you easily edit and format documents. You can use word processors to undo and redo actions, justify text change font parameters, change paragraph spacing and perform various other editing and formatting functions.
![]() Entering Text
Entering Text
When you start MS-Word, a blank new document is automatically opened. You can see the cursor blinking/ indicating the position to enter the text. Suppose a document file already exists and you want to open a new document to enter text, you can follow these steps:
You do not have to press the Enter key when you reach the end of the line. MS Word will automatically go to the next line. Only press the Enter key if you wish to insert a blank line in your text. Holding the Shift Key down as you type a letter creates capital letters. A space is inserted by pressing the long Space Bar at the bottom of your keyboard.
![]() Editing Text
Editing Text
When you enter your text, you are liable to make mistakes; hence you need to edit your document. Although you create a file only once, you can edit it many times.' Editing can add, rearrange or delete data, such as text, numbers or pictures. Imagine that you have written a letter to a friend about your holiday. After writing the letter, you decide to make some changes to it. You want to edit and delete some text, change the line spacing and increase the font size. Instead of rewriting the entire letter, you can use a word processor to edit and format the document.
![]() Inserting Text
Inserting Text
While creating your document, you may find you need to insert text?place new text between existing texts. Suppose, you type the sentence, "Ria has a blue box." After typing it, you decide you want to change the sentence to "Ria has a big blue box". With Microsoft Word, inserting a word, phrase or even several paragraphs is easy. Alternatively, you may want to overtype text - replace old text with new text. For example, suppose you type the sentence, "Ria has a big blue box". After typing it, you decide you want to change the sentence to "Ria has a big brown box". With Microsoft Word, overtyping the word blue with the word gray is also easy. When editing is in progress, MS Word usually inserts characters, unless it is set to replace (overwrite) them instead.
To insert characters, position the cursor at the point where the characters have to be inserted. Before you attempt to insert or overtype, you should check the mode you are in- Insert or Overtype. When the OVR button is dimmed on the Status bar, MS Word is in the insert mode and when it is highlighted, it is in the overwrite mode. When Insert is ON, pressing the Insert key on the keyboard turns it OFF so that the existing characters get replaced as the new ones are typed in. When you are in Insert mode, you can insert text. When you are in Overtype mode, you can overtype text. By default, Microsoft Word is in the Insert mode.
![]() Selecting Text
Selecting Text
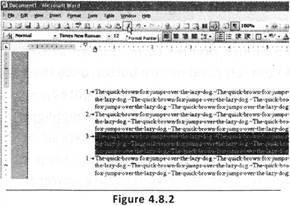
Highlighting is very important in word processing to select the text. When you highlight some text you can do things like changing the size of the font, underlining it, making it bold, and deleting it altogether and so on. But only the text that you have highlighted will change. The rest of your document will remain unchanged. So if we were to change the size of the font in a document where two lines have been highlighted, only the two lines that have been highlighted will change size. (See figure 4.8.2) There are quite a few different ways to highlight text.
![]() Highlighting an entire document. You can highlight your entire document from the Edit menu:
Highlighting an entire document. You can highlight your entire document from the Edit menu:
![]() Highlighting an entire line:
Highlighting an entire line:
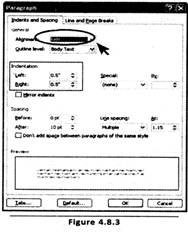
Most of the time, you do not need to highlight the entire document, but just sections of it. You can highlight an entire line with just one mouse click. To highlight a single line, move your mouse over to the left margin of your document. (See figure 4.8.3)
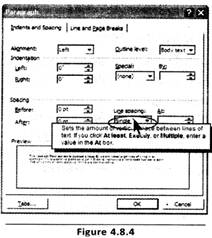
If the mouse pointer turns into an arrow, click your left hand mouse button once then let go. A single line will be highlighted. You can use the same technique to highlight more than one line at a time. Instead of letting go of the left mouse button, keep it held down then move your mouse upwards or downwards in a straight line. (See figure 4.8.4)
![]() Deleting Text
Deleting Text
Word processors come with 3 important operations - Cut/Copy and Paste, and that is their main advantage over the typewriter. Making changes and corrections in a document with a word processor is very simple and there will be no ugly marks or overwriting or the use of the whitener as in the case of a typewriter. There are a number of ways to cut text, and you will learn two techniques in this part: using the menu and using the keyboard.
![]() Deleting text Using the Menu bar:
Deleting text Using the Menu bar:
![]() Deleting text using the Keyboard:
Deleting text using the Keyboard:
![]() Moving Text
Moving Text
After creating a document, you may find it necessary to move a single word or a line or a whole paragraph to a new location in the document. Just like deleting text, this can be done in two different ways.
![]() Cutting and Pasting with the Menu bar:
Cutting and Pasting with the Menu bar:
![]() Cutting and Pasting using the Keyboard:
Cutting and Pasting using the Keyboard:
![]() Copying Text
Copying Text
We can make a copy of a block of text in another part of the same document. We can do this in two ways - by using the menu bar and the keyboard.
![]() Copying and Pasting with the Menu bar:
Copying and Pasting with the Menu bar:
This will copy your text to the new location and the text in the original position also remains.
![]() Copying and Pasting using the Keyboard:
Copying and Pasting using the Keyboard:
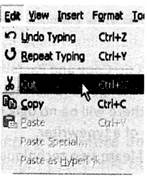
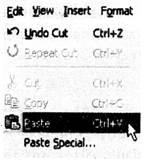
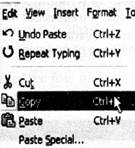
The text is pasted to the new position. You learned about the Cut, Copy and Paste techniques. There is another shortcut to delete, move and copy text by using the icons on the toolbar.
![]() The button for Cut, Copy and Paste look like this:
The button for Cut, Copy and Paste look like this:
The first icon is Cut, the second is Copy and the third is Paste.
If you want to cut text using the icon, first select your text. Then click Cut Icon. If you want to paste the text somewhere, position your cursor at the new location then click Paste button. Instead of clicking Cut icon first, you can click Copy button. Then click the Paste button to paste your text at a new location.
![]()
![]() Setting Margins
Setting Margins
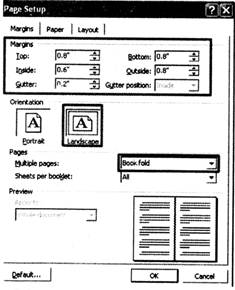
After creating a draft copy of the document, you might feel like changing the page layout. You can alter the margins at the left, right, top and bottom so that the text is displayed according to your requirements. (See figure 4.8.5)
![]() To change margins, perform the following steps:
To change margins, perform the following steps:
![]() Aligning Text
Aligning Text
Alignment means to position the text in specific margins.
It can be done using Left ![]() Center
Center ![]() Right
Right ![]() and justified
and justified ![]() on the formatting toolbar.
on the formatting toolbar.
MS Word allows you to position text on page quickly and easily.
![]() Examples of the four alignment options in Microsoft Word are the following:
Examples of the four alignment options in Microsoft Word are the following:
![]()
![]() Left: Alignment Example Description
Left: Alignment Example Description
![]() Center: All lines are even at the left margin but are ragged at the right margin
Center: All lines are even at the left margin but are ragged at the right margin
![]() Right: All lines are centered between margins
Right: All lines are centered between margins
![]() Justified: All lines are ragged at the left margin but are even at the right margin
Justified: All lines are ragged at the left margin but are even at the right margin
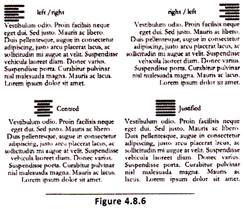
All lines are even at the left and right margins, except for the last line of the paragraph. Usually text in the columns of newspaper or magazine articles is justified. You can change text alignment by using the Formatting toolbar. Alignment can be changed before or after text is typed. To change alignment before you type, click alignment option you want on the Formatting toolbar before you start typing. To change alignment after you have typed text, select the text with your mouse first, then click on the alignment option you want on the Formatting toolbar. (See figure 4.8.6)
![]() Selecting a Font and Font Size
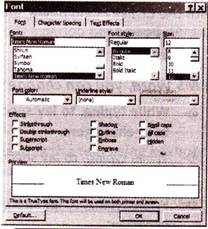
Selecting a Font and Font Size
![]()
![]()
As you can see, the two styles are completely different. The first of the letter e is the very popular font "Times New Roman". The second letter e is the most popular font "Arial". With Microsoft Word, the default font you get is Times New Roman.
![]() Steps to change the font of text:
Steps to change the font of text:
![]() Steps to change the font size:
Steps to change the font size:
![]() Bold, Italic or Underline
Bold, Italic or Underline
While typing, to lay special emphasis on some words, you can display it in bold characters or you could give it a slant shape (italic) or underline it to mark it as important. In MS Word, you can change your text attributes. This means you can represent any part of your text in bold, italics or underline. To do this in Microsoft Word, you have to highlight the text first.
There are two very easy ways to make your highlighted text bold. The first is by clicking the "B" icon on the toolbar. It looks like this:

With your text highlighted, click the "B" icon. Your text will turn bold. The "B" icon will change to this:
![]()
This indicates that Bold text is switched on. To turn off Bold text, highlight the text and then click the B icon with the left mouse button.
Another way to turn text to bold is to hold down the Ctrl key on your keyboard. With the Ctrl key held down, press the letter "B" on your keyboard.
Similarly, to italicize the highlighted text, click the italic icon in the tool bar. The icon will look like this after you have clicked the letter "I".

Another way to turn text to italics is to hold down the Ctrl key on your keyboard. With the Ctrl key held down, press the letter "I" on your keyboard.

![]() In MS Word, you can change your text attributes. It looks like this:
In MS Word, you can change your text attributes. It looks like this:
To underline some text, click the fetter "U" of the shown icons. The keyboard shortcut is Ctrl plus the letter "U".
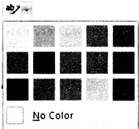
![]() Applying Colour
Applying Colour
Microsoft Word contains many tools for giving a document a professional and polished look. To colour the text and make it look like as if it was marked by a highlighter pen, select the required text and then click ab button on the toolbar. You can use the down arrow to view the list of available colours and then select the one you want. (See figure 4.8.8)
![]() Saving Text
Saving Text
Saving your work is important so that you can use it later whenever you want without having to redo it all over. Saving a file in MS Word is simple.
Perform the following steps to save a document:
When you save a document, Word automatically adds a period (.) and an extension doc to the file name.
![]()
![]() Given below are the steps for cutting and pasting the text using keyboard. The steps are given in jumbled form. Arrange the steps correctly.
Given below are the steps for cutting and pasting the text using keyboard. The steps are given in jumbled form. Arrange the steps correctly.
1. The text is pasted to the new position.
2. Select the text you want to Cut and Paste.
3. Move the cursor to the place where you want to paste your text.
4. Press the letter "V" on your keyboard.
5. Hold down the Ctrl key on your keyboard.
6. Hold down the Ctrl key on your keyboard.
7. Press the letter "X" on your keyboard. The text is cut.
(A) 1![]() 2
2![]() 3
3![]() 4
4![]() 5
5![]() 6
6![]() 7
7
(B) 2![]() 6
6![]() 7
7![]() 3
3![]() 5
5![]() 4
4![]() 1
1
(C) 3![]() 5
5![]() 4
4![]() 6
6![]() 1
1![]() 2
2 ![]() 7
7
(D) 7![]() 6
6![]() 5
5![]() 4
4![]() 3
3![]() 2
2![]() 1
1
(E) 4![]() 3
3![]() 5
5![]() 6
6![]() 1
1![]() 2
2![]() 7
7
Answer: (b)
Explanation
Correct Option:
(B) In option (B) steps are arranged correctly.
Incorrect Options:
(A) In option (A) steps are arranged incorrectly.
(C) In option (C) steps are arranged incorrectly.
(D) In option (D) steps are arranged incorrectly.
(E) In option (E) steps are arranged incorrectly.
![]() Fill in the blanks:
Fill in the blanks:
1. When the ____ button is dimmed on the Status bar, MS Word is in the insert mode.
2. ______ means to position the text in specific margins.
3. To do formatting on the text first of all you have to ____ the text.
(A) Insert, Indentation, Highlight
(B) OVR; Indentation, Copy
(C) OVR, Alignment, Highlight
(D) Insert, Alignment, Paste
(E) OVR, Indentation, Highlight
Answer: (c)
Explanation
Correct Option:
(C) Options given in (C) are correct.
Incorrect Options:
(A) Options given in (A) are incorrect.
(B) Options given in (B) are incorrect.
(D) Options given in (D) are incorrect.
(D) Options given in (E) are incorrect.


You need to login to perform this action.
You will be redirected in
3 sec

